地図の移動
指定の座標へ移動
現在地図に表示されている位置から、指定した座標へ移動する方法を確認します。Mapクラスで用意されている「panTo」methodを使います。
panTo(latLng:LatLng) 戻り値:None
地図の中心を指定された LatLng に変更します。
変更範囲が地図の幅と高さの両方よりも
小さい場合、遷移はスムーズにアニメーション表示されます。
引数に移動後の座標を表すLatLngクラスのオブジェクトを指定します。
移動する場合、横方向の移動が地図の幅よりも小さく、縦方向の移動が地図の高さよりも小さい場合には、スムーズにアニメーション表示で移動します。移動が地図の幅や高さよりも大きい場合には地図が切り替わるように移動します。
実際には次のように記述します。
function initialize() {
  var latlng = new google.maps.LatLng(35.658704,139.745408);
  var opts = {
    zoom: 8,
    center: latlng,
    mapTypeId: google.maps.MapTypeId.ROADMAP
  };
  var map = new google.maps.Map
    (document.getElementById("map_canvas"), opts);
  map.panTo(new google.maps.LatLng(35.958704,139.795408));
}
サンプルコード
サンプル.js
function initialize() {
  var latlng = new google.maps.LatLng(35.680865,139.767036);
  var opts = {
    zoom: 13,
    center: latlng,
    mapTypeId: google.maps.MapTypeId.ROADMAP
  };
  map = new google.maps.Map(document.getElementById
    ("map_canvas"), opts);
}

function toTokyo() {
  map.panTo(new google.maps.LatLng(35.681382,139.766084));
}
function toShinjyuku() {
  map.panTo(new google.maps.LatLng(35.690921,139.700258));
}

function toIkebukuro() {
  map.panTo(new google.maps.LatLng(35.728926,139.71038));
}
サンプル.html
<!DOCTYPE html>
<html lang="ja">
<head>
<meta charset="UTF-8">
<title>Google Maps JavaScript API 指定の座標へ地図を移動する</title>
<style>
p {line-height:180%}
.head-title {width:100%;background:#87ceeb;color:#fff;text-indent:8px;font-weight:700;line-height:180%}
.button-form{width:100%;margin-top:20px}
</style>
<script
 src="https://maps.google.com/maps/api/js?key=APIキー"></script>
<script src="サンプル.js"></script>
</head>
<body onload="initialize()">
<div class="head-title">Google Maps APIを使ったサンプル。</div>
<p>指定の座標へ地図を移動する</p>
<div id="map_canvas" style="width:100%;height:300px"></div>
<div class="button-form">
<form>
<input type="button" id="Tokyo" value="東京駅"
    onclick="toTokyo()">
<input type="button" id="Shinjyuku" value="新宿駅"
    onclick="toShinjyuku()">
<input type="button" id="Ikebukuro" value="池袋駅"
    onclick="toIkebukuro()">
</form>
</div>
</body>
</html>
表示例 指定の座標へ地図を移動する
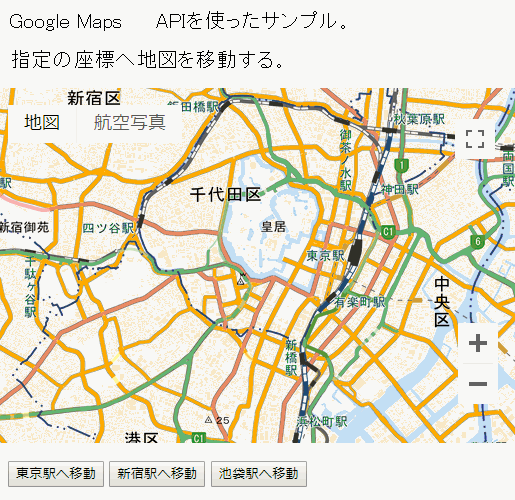
地図サンプルイメージ
指定座標へ地図を移動
サンプルイメージ地図は地理院タイル (標高タイル)を加工して作成
Google Maps サンプル > 指定の座標へ地図を移動する
※リクエスト制限を設けてありますので1日の上限アクセス(割り当て)を超えた場合、サンプルが機能しないこともありますのでご了承ください。
指定したピクセル分を移動
現在地図に表示されている位置から、指定した値分だけ移動する方法を確認します。値はピクセル単位で指定します。Mapクラスで用意されている「panBy」methodを使います。
panBy(x:number,y:number)  戻り値:None
ピクセル単位で指定した距離だけ、地図の中心を変更します。
距離が地図の幅と高さの両方よりも小さい場合、
遷移はスムーズにアニメーション表示されます。
地図の座標系は西から東(x 値の場合)、北から南(y 値の場合)
に増えることに注意してください。
1番目の引数でX軸方向の値、2番目の引数でY軸方向の値を指定します。X軸には左から右(西から東)が正の値、Y軸については上から下(北から南)が正の値となります。 各々逆の移動は負の値となります。
移動する場合、横方向(X軸)の移動が地図の幅よりも小さく、縦方向(Y軸)の移動が地図の高さよりも小さい場合には、スムーズにアニメーション表示で移動します。移動が地図の幅や高さよりも大きい場合には地図全体が切り替わり移動します。
実際には次のように記述します。
function initialize() {
  var latlng = new google.maps.LatLng(35.658704,139.745408);
  var opts = {
    zoom: 8,
    center: latlng,
    mapTypeId: google.maps.MapTypeId.ROADMAP
  };
  var map = new google.maps.Map
    (document.getElementById("map_canvas"), opts);
    map.panBy(100, -50);
}
サンプルコード
サンプル.js
function initialize() {
  var latlng = new google.maps.LatLng(35.680865,139.767036);
  var opts = {
    zoom: 13,
    center: latlng,
    mapTypeId: google.maps.MapTypeId.ROADMAP
  };
  map = new google.maps.Map(document.getElementById
    ("map_canvas"), opts);
}

function toRightDirection() {
  map.panBy(250, -250);
}

function toLeftDirection() {
  map.panBy(-800, 800);
}
サンプル.html
<!DOCTYPE html>
<html lang="ja">
<head>
<meta charset="UTF-8">
<title>Google Maps JavaScript API 指定したピクセル分を移動する</title>
<style>
p {line-height:180%}
.head-title {width:100%;background:#87ceeb;color:#fff;text-indent:8px;font-weight:700;line-height:180%}
.button-form{width:100%;margin-top:20px}
</style>
<script
 src="https://maps.google.com/maps/api/js?key=APIキー"></script>
<script src="サンプル.js"></script>
</head>
<body onload="initialize()">
<div class="head-title">Google Maps APIを使ったサンプル。</div>
<p>指定したピクセル分を移動</p>
<div class="button-form">
<form>
<input type="button" id="rightDirection" value="右上方向"
onclick="toRightDirection()">
<input type="button" id="leftDirection" value="左下方向"
onclick="toLeftDirection()">
</form>
</div>
</body>
</html>
表示例 指定したピクセル分を移動する
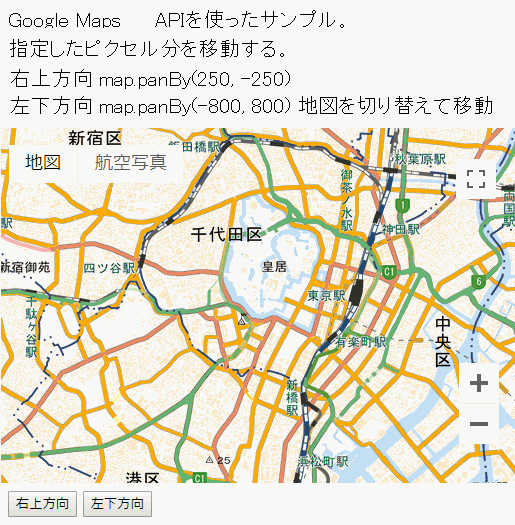
地図サンプルイメージ
指定したピクセル分を移動
サンプルイメージ地図は地理院タイル (標高タイル)を加工して作成
Google Maps サンプル > 指定したピクセル分を移動する
※リクエスト制限を設けてありますので1日の上限アクセス(割り当て)を超えた場合、サンプルが機能しないこともありますのでご了承ください。
矩形領域 位置へ移動
現在表示されている位置から指定した矩形領域が地図内に表示されるような位置へ移動する方法を確認します。Mapクラスで用意されている「panToBounds」methodを使います。
panToBounds(latLngBounds:LatLngBounds) 戻り値:None
与えられた LatLngBounds を表示するために必要な最小量だけ、地図を移動します。
地図上のどこに境界が置かれるかは保証されませんが、可能な限り境界が表示
されるようになります。
境界は、地図上に存在するマップ タイプとナビゲーション コントロールにバインド
された領域内に配置されます。
境界が地図よりも大きい場合、地図は境界の北西の隅を含むように移動します。
地図の位置の変更範囲が地図の幅と高さの両方よりも小さい場合、遷移はスムーズ
にアニメーション表示されます。
引数には矩形領域を表す為に使用するLatLngBoundsクラスのオブジェクトを指定します。LatLngBoundsクラスは左下と右上の座標をそれぞれ持つクラスで次のようにオブジェクト作成します。
southWest = new google.maps.LatLng(-31.203405,125.244141);
northEast = new google.maps.LatLng(-25.363882,131.044922);
var bounds = new google.maps.LatLngBounds(southWest,northEast);
map.fitBounds(bounds);
この右下と左上を対角の頂点とする矩形領域が地図内に表示されるように移動することになります。
地図の大きさよりも指定した矩形領域の大きさが大きい場合は矩形領域の左上が地図内に入るように移動します。
次のように記述します。
function initialize() {
  var latlng = new google.maps.LatLng(35.688588,139.71069);
  var opts = {
    zoom: 8,
    center: latlng,
    mapTypeId: google.maps.MapTypeId.ROADMAP
  };
  var map = new google.maps.Map
    (document.getElementById("map_canvas"), opts);
    map.panBy(100, -50);
     var southWest = new google.maps.LatLng(35.675888,139.7448576);
     var northEast = new google.maps.LatLng(35.6894875,139.6917064);
     var bounds = new google.maps.LatLngBounds(southWest,northEast);
     map.panToBounds(bounds);
}
サンプルコード
サンプル.js
var map;

function initialize() {
  var latlng = new google.maps.LatLng(36.049932,138.086128);
  var opts = {
    zoom: 2,
    center: latlng,
    mapTypeId: google.maps.MapTypeId.ROADMAP
  };
  map = new google.maps.Map(document.getElementById
("map_canvas"), opts);
}

function toAustralia() {
  var southWest = new google.maps.LatLng(-44.087585,109.335938);
  var northEast = new google.maps.LatLng(-4.565474,157.851563);
  var bounds = new google.maps.LatLngBounds(southWest, northEast);
  map.panToBounds(bounds);
}

function toEuropa() {
  var southWest = new google.maps.LatLng(31.653381,-19.6875);
  var northEast = new google.maps.LatLng(74.019543,48.164063);
  var bounds = new google.maps.LatLngBounds(southWest,northEast);
  map.panToBounds(bounds);
}

function toSAmerica() {
  var southWest= new google.maps.LatLng(-58.447733,-96.328125);
  var northEast = new google.maps.LatLng(17.308688,-29.882812);
  var bounds = new google.maps.LatLngBounds(southWest,northEast);
  map.panToBounds(bounds);
}
サンプル.html
<!DOCTYPE html>
<html lang="ja">
<head>
<meta charset="UTF-8">
<title>Google Maps JavaScript API 矩形領域 位置へ移動</title>
<style>
p {line-height:180%}
.head-title {width:100%;background:#87ceeb;color:#fff;text-indent:8px;font-weight:700;line-height:180%}
.button-form{width:100%;margin-top:20px}
</style>
<script
 src="https://maps.google.com/maps/api/js?key=APIキー"></script>
<script src="サンプル.js"></script>
</head>
<body onload="initialize()">
<div class="head-title">Google Maps APIを使ったサンプル。</div>
<p>矩形領域 位置へ移動</p>
<div id="map_canvas" style="width:100%;height:300px"></div>
<div class="button-form">
<form>
<input type="button" id="australia" value="オーストラリア"
onclick="toAustralia()">
<input type="button" id="europa" value="ヨーロッパ"
onclick="toEuropa()">
<input type="button" id="samerica" value="南アメリカ"
onclick="toSAmerica()">
</form>
</div>
</body>
</html>
表示例 矩形領域 位置へ移動する
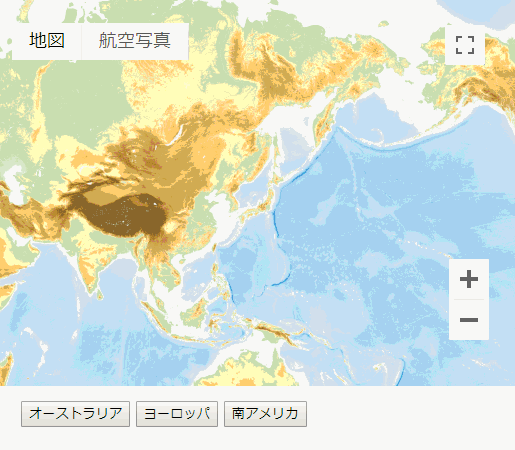
地図サンプルイメージ
矩形領域 位置へ移動
サンプルイメージ地図は地理院タイル (標高タイル)を加工して作成
Google Maps サンプル > 矩形領域 位置へ移動する
※リクエスト制限を設けてありますので1日の上限アクセス(割り当て)を超えた場合、サンプルが機能しないこともありますのでご了承ください。